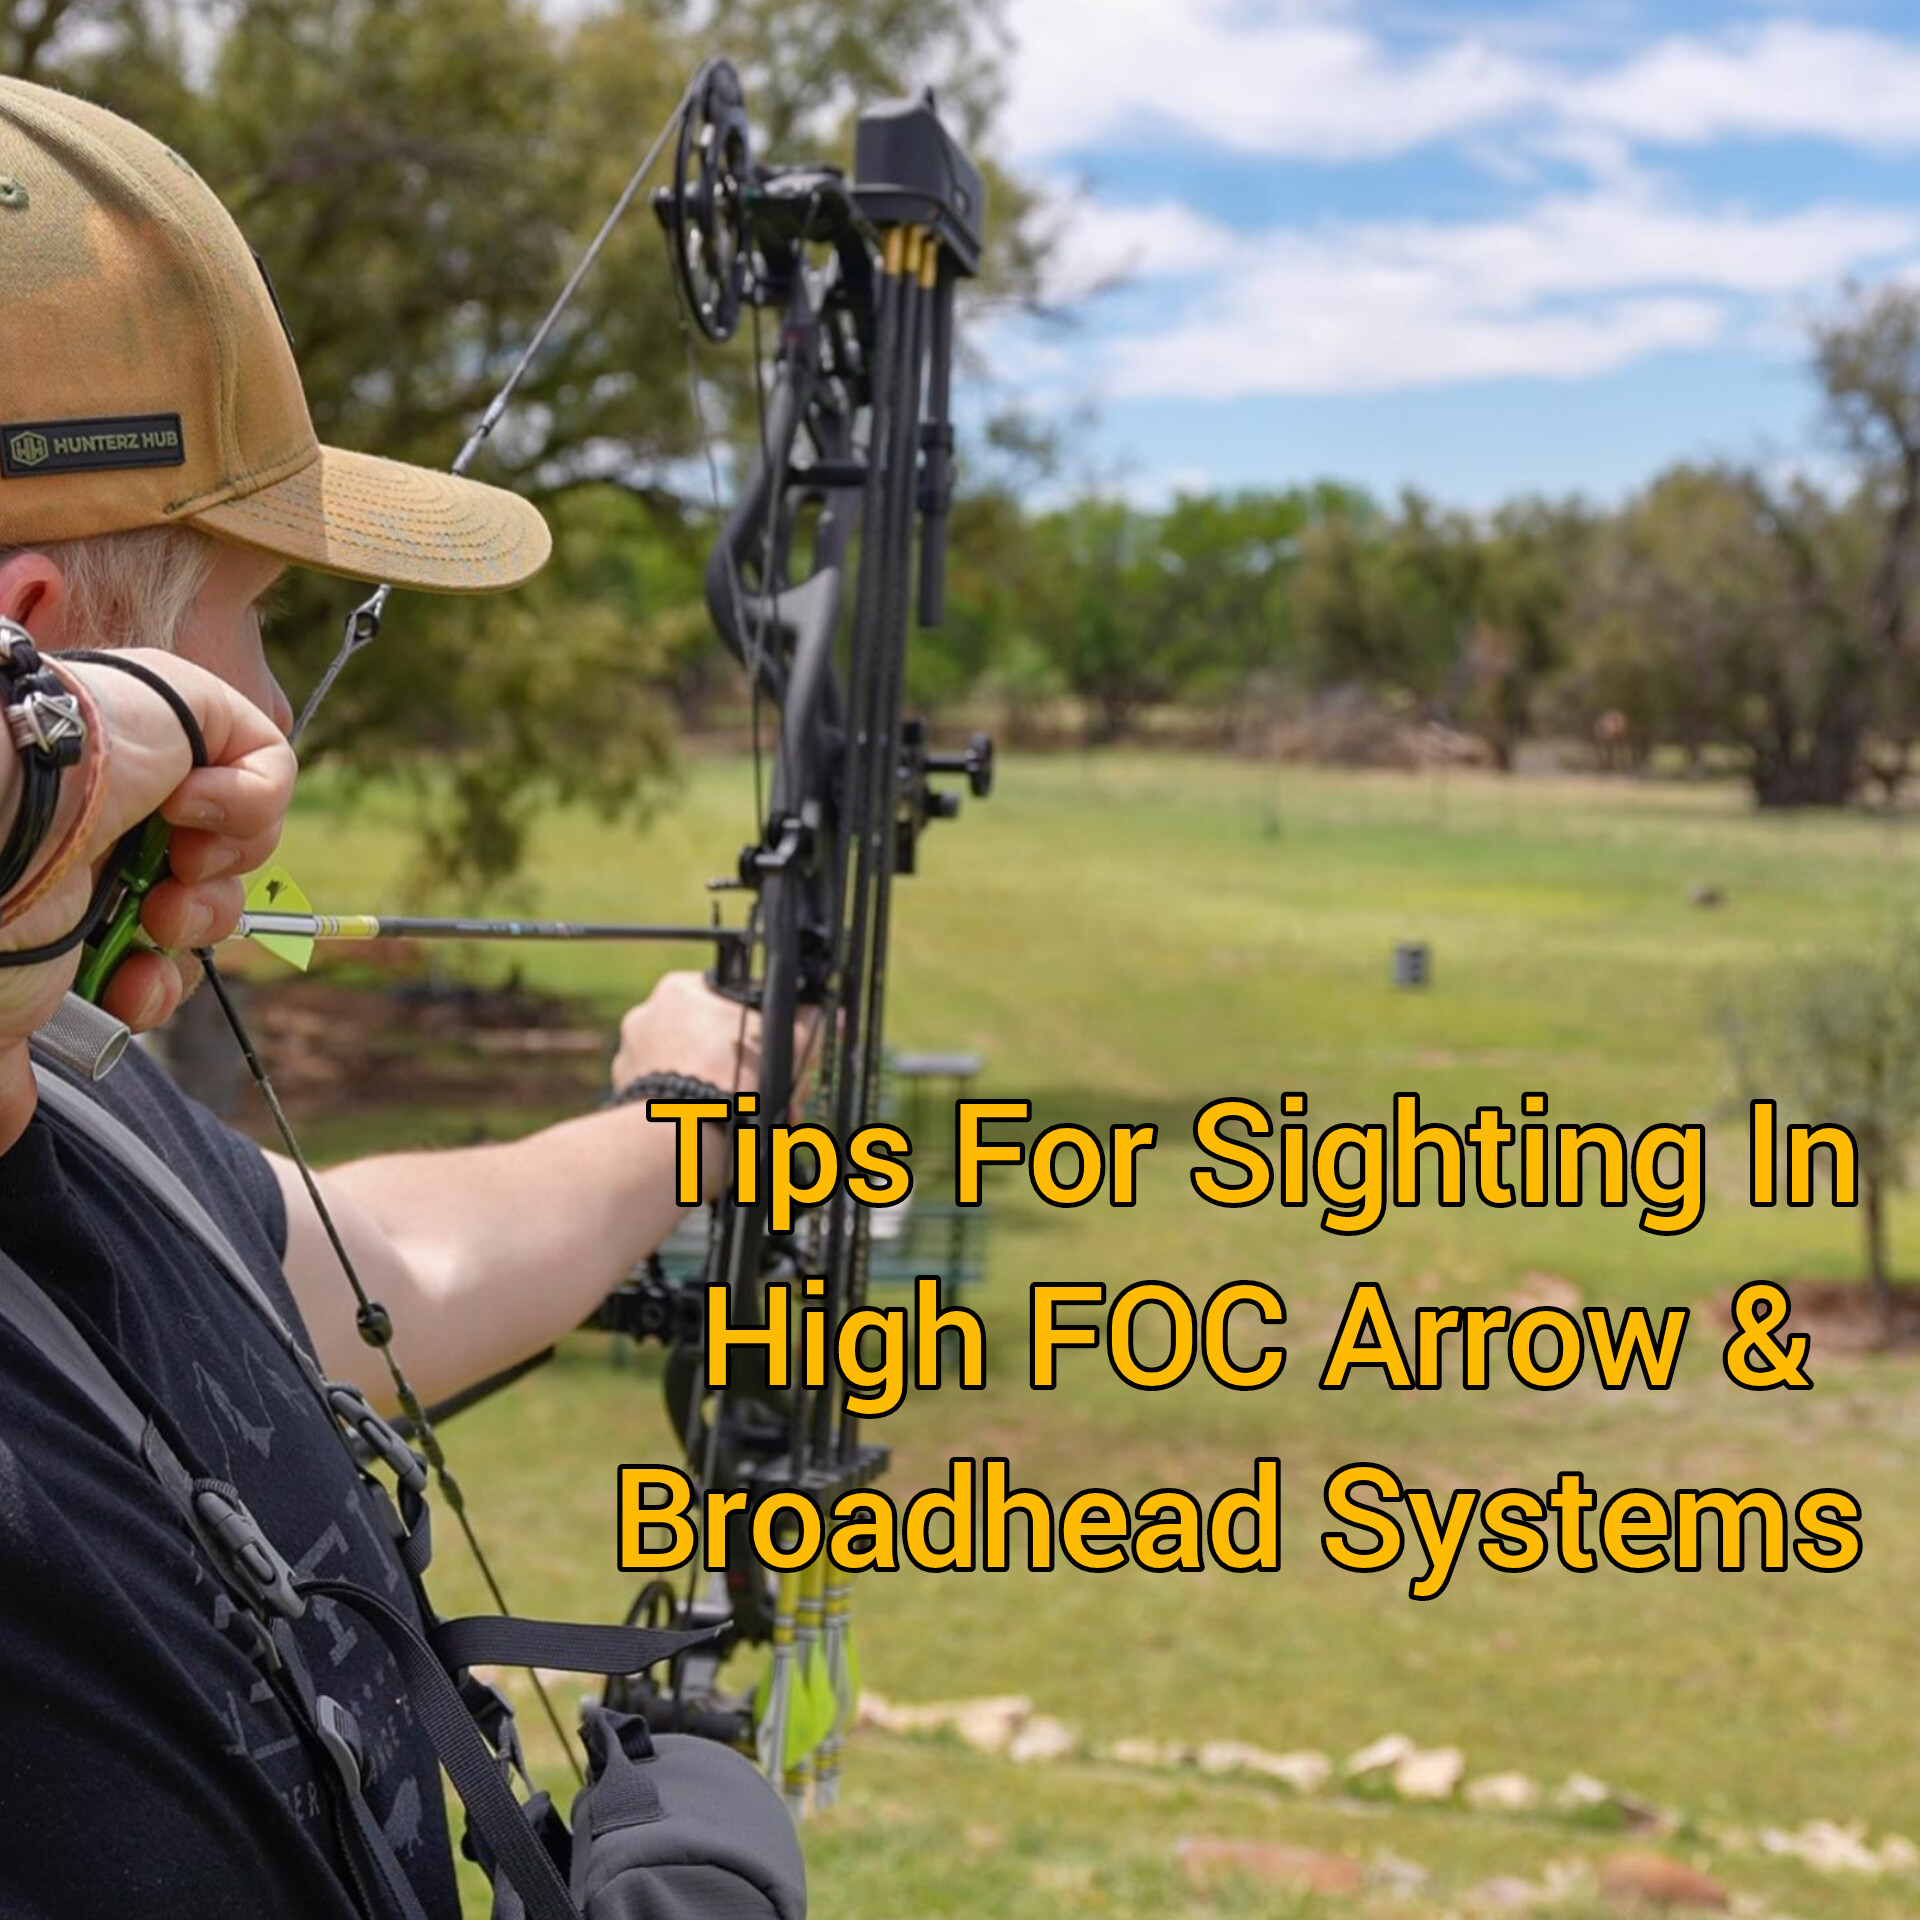
GrizzlyStik Arrow Tuning Cheat Sheet
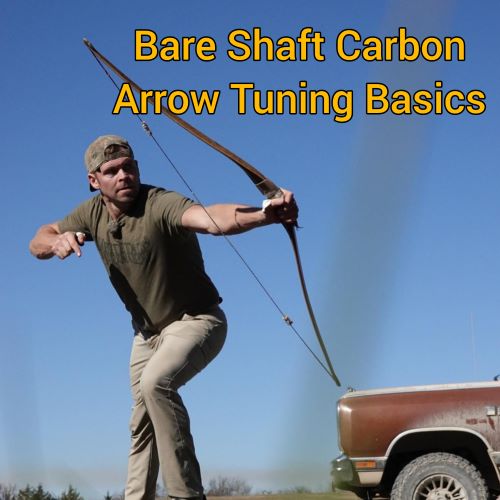
Bareshaft tuning is an important step in finding the perfect arrow for a given bow. It enables an archer to observe arrow flight, set the proper nock point, and create an arrow that will fly perfectly when fletched. I use this method for every new bow I buy and highly recommend it to others.
Determining the appropriate arrow spine and length for your traditional bow is a little like shopping for new clothes: one size does not fit all! Just as it is true that a size 10 in one designer's clothing line is not the same size 10 made by another designer, tuning arrows to a bow is no different. Just because two traditional bows may be of equal weight at the same draw length, if they are made by different bowyers, odds are the perfect arrow for each bow may be different. However, through the use of the bare shaft tuning method, every bow can find the perfect arrow match.
The laws of physics play an important role in arrow balance, behavior, and trajectory. Without embarking upon a qualitative study of why this is true, suffice it to say that an arrow's length, point weight, rear weight, and drag from fletchings influence its spine relative to the bow's design. Thus, all of these factors must be taken into consideration when preparing to find the perfect arrow for any given bow. There will be more about this later. For now, let's focus on a discussion of the bareshaft method.
To begin, you will need a means of cutting your arrows. If you shoot carbons, you will need a high-speed saw. Aluminum arrows can be cut using a tube cutter from a hardware store. Another alternative is to conduct bare shaft tuning at your local pro shop and ask them to do the cutting for you.
Looking for high-quality carbon hunting arrows?
Check out GrizzlyStik Momentum TDT - tapered carbon hunting arrows!
Check out Overkill Banshee - carbon hunting arrows!
First, there are a few basic arrow-tuning rules that are of important note. They are as follows:
-Adding arrow length weakens the arrow spine.
-Adding point weight weakens the arrow spine.
-Shortening the arrow length stiffens the arrow spine.
-Reducing point weight stiffens the arrow spine.
-Adding rear weight stiffens the arrow spine.
-Adding fletchings stiffens the arrow spine.
-If an arrow hits consistently to the left (for a right-handed shooter) of the intended target point, it is too stiff. This would be right for a lefty.
-If an arrow hits consistently to the right (for a right-handed shooter) of the intended target point, it is too weak. This would be left for a lefty.
-In general, an arrow that is SLIGHTLY weak will be more forgiving than an arrow that is too stiff.
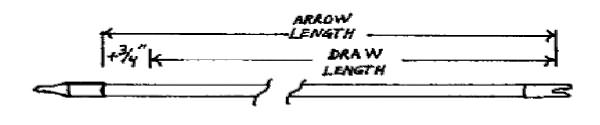
To illustrate this method it is best to begin with an example. So, let's assume that you have a new traditional bow that is 45# at your 26 inch draw length. You have decided to shoot Vapor 2000 carbon arrows which are said by the manufacturer to be spined at 35# to 45#. Remember that all spine testing is done with a 28 inch arrow, so based on the rules above, since your draw is less than 28 inces, you will likely need to add length beyond 28 inches, add point weight, or both in order to achieve a properly spined arrow for your bow.
The first step in bare shaft tuning is, to begin with a full length shaft with a target point installed. With a carbon arrow, I recommend 175-225 grains of point weight for bows below 50 lbs. For aluminum or wood, 125 to 150 grains up front should be plenty. Stand 15 yards from your target with your bow held vertically, aim at the bullseye, draw, anchor, and release.
Since the first thing that must be adjusted is the bow's nock point, only observe the up and down position of the arrow's nock in relation to center at this time. Disregard any left or right movement.
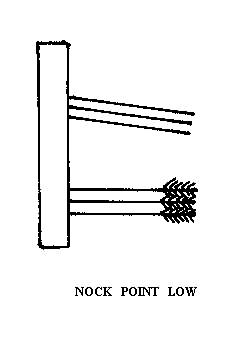
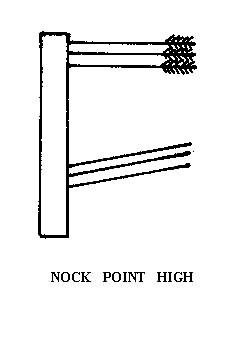
Start with a nock point on your bow string at 5/8" above center and work your way down. If the arrows are entering the target with a nock low position rather than straight, raise your nock point slightly. Likewise, if the nock position of the arrow is consistently above the center, lower the nock point on the bow slightly. Repeat this process until your bare shafts are entering your target straight. Once this is accomplished, it is time to move on to establishing the best spined arrow for your bow.
Shoot your full length bare shaft into a target as above. Assuming that the arrow is too weak, and you are a right-handed shooter, the arrows will be far right of your intended mark. Cut off the arrow's length from the point end, reinstall the point insert, and repeat. Continue this process until the arrow consistently hits the target 4 to 5 inches weak. The reason a weak bare shaft is desired is that the weight and drag added to the rear of the arrow when fletchings are applied actually stiffens the shaft. The result is that a bare shaft that hits slightly weak will hit right in the bullseye when fletched.
Once bare shaft tuning has been completed, a shaft must be fletched and tested. If your bare shaft testing has been properly done, you should find that your arrows are accurate and incredibly forgiving, which makes them perfect for both target and hunting applications. Just remember, the set of arrows you have just tuned to a bow may not be appropriately tuned for another bow of similar weight. As mentioned in an earlier paragraph about arrow tuning and physics, the arrow's performance is relative to a bow's design. Thus, any minor design difference from one bow to another (ie. Centershot) can profoundly influence the best arrow and point weight combination for a given bow. Therefore, it is prudent to bare shaft a set of arrows to each individual bow.
There is no doubt that the bare shaft tuning method takes both time and effort. However, in hunting the stakes are high, and when you make a clean kill on the animal of your dreams, I'm sure you will agree that the investment was worth it.
|
TUNING LONGBOWS & RECURVES |
||||||||||
|
One of the reasons many folks enjoy shooting traditional equipment is its simplicity. A bow with no mechanical parts that aren't glued on. No set screws, no micro adjustments, and fiberoptic sights, just not much there to go wrong. But you still have to "tune" your equipment if you want to get the best accuracy and performance potential. The methods and techniques for tuning traditional bows is the same as it is with compounds. The same laws of physics apply. The big difference is you don't have the easy adjustments that are built into compounds so other remedies have to be used. The closer to centershot a bow is, the easier it is to tune and the wider range of spines it can shoot well. Just because a bow can shoot arrows at the low or high end of the spectrum, doesn't mean we should accept adequate arrow flight around the edges. Somewhere in the middle of that range is going to be the best arrow spine combination that will be more forgiving of human errors and conditions you are likely to encounter in the field. Taking the time to tune your equipment is time well spent.
The Shot
A common misunderstanding is confusing arrow spine with arrow weight. They are not related and are two different things. Don't fall for the marketing ploy that so and so's bows are so powerful they require a 10 or 15 pound heavier spine to shoot well. That's a bunch of BS and has less to do with the power of the bow and more to do with how close to center shot the bow is, as we will see later.
Arrows that are going to be shot off the shelf, as most folks do, need to be fletched with 5" or 5 1/2" feathers if broadheads are going to be used, and in either a left or right helical twist. The twist doesn't make any difference but all your arrows should be the same. Wood arrows are considered by some to be more traditional, especially with longbows but they have their drawbacks. Good wood arrows are not cheap, even more, expensive than aluminum. Building them yourself won't help much if you are as picky with them as I am. If I get 18-24 arrows out of 100 shafts, I'm lucky. First, they must be matched closely in spine and weight, second, they must be straight, and third, they must be sealed well so they do not warp from moisture! A source I recommend for quality wood arrows is Old South Traditional Arrows. Aluminum arrows are great, with very straight and consistent spine. Spending a little more on XX75 or XX78 shafts will save you money in the long run as they do not bend or break as easily as cheaper aluminums. Carbons are straight, tough, and can be expensive! Lots of people really like them. For the safety of your bow and to absorb enough energy from your bow, your arrows need to weigh 8 to 10 grains per pound of draw weight. Up to 12 or 14 grains/pound for hunting larger game. This can be a problem with carbon arrows and some aluminum. Weight may need to be added or a different arrow chosen. Initial Bow Setup Your arrow rest? Extremely important for good arrow flight. Shoot off the shelf or use an elevated rest. Really it's a personal choice but as a rule, instinctive shooters like to have the arrow as close to the hand as possible, which means shooting off the shelf. Many gap/point of aim shooters prefer an elevated rest. Either way, the point your arrow contacts the bow should be directly above the pressure point/low point in the grip. Many arrow shelves are not designed to do this so you need to build up the shelf with layers of leather, the rug side of Velcro, or something to get the contact point in the correct place. See the figure below:
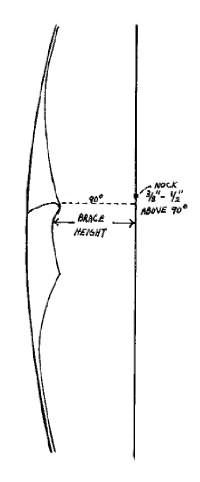
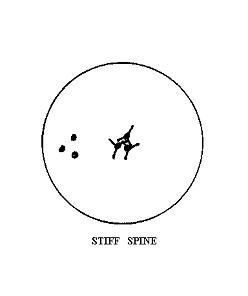
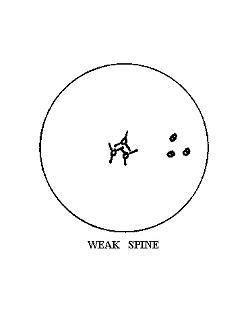
Next, set the brace height at the low end of the bowyer's recommendation, just twist or untwist the string to set the brace height. Install a nock point 1/2" to 3/4" above 90 degrees. Now with arrows that you think are going to be close to the correct spine and weight, take the bow out and start shooting it. If the string is new, you want to run 75 or 100 arrows through it just to stretch the string until it settles. Re-adjust the brace height to the low setting again if necessary. Shoot 3 or 4 arrows and pay attention to any hand shock, vibration, and noise. Put 4 or 5 twists in the string and shoot 4 or 5 more arrows, again paying attention to vibration and noise. Keep doing this until the bow starts shooting smoothly and quietly, if you go above this brace height, it will start getting noise and vibration again so drop back down. Once the best brace height is found, measure it and write it down somewhere so if you change strings or the string stretches more, you can re-adjust it without going through this process again. Now we can get to some serious tuning. TUNING METHODS The key ground rule in tuning is to only change one variable at a time, and then analyze the results. If you change two or more variables, and your arrow flight gets a little better or worse, you don't know which change caused the results which creates even more confusion. Your shooting form must be fairly consistent, if not, erratic arrow flight will occur even with a properly tuned bow. That doesn't mean you have to be a great shot, as long as you can shoot a "group", you'll be able to determine needed changes and get closer to perfection. Lastly, never make adjustments based on the flight of just one arrow, base your adjustments on the average between several arrows, especially wood arrows where spine consistency and straightness can be a problem. Basing your adjustments on the average of many arrows helps remove the flaws in our form leaving only equipment problems. The detailed descriptions below are for a right-handed shooter. Up and down adjustments with the nock point are the same if you are right handed or left handed. Left or right adjustments however are reversed. For explanation purposes, all discussions will be for right handed shooters. If you are left handed just reverse all left/right indications. BARE SHAFT PLANNING To get started, it's easiest if you have at least several close to correct sized shafts from the chart and several above and below the recommended size also. That is not always possible so let's just say you only have the recommended size from the chart. Your bow should be set up exactly the way you intend to hunt with it. All silencers installed, brush buttons, arrow rest, bow quiver, etc.... Install field tips of the same weight as the broadheads you want to shoot if you have a choice. If you are stuck with only one size shaft, you may be forced to shoot tips heavier or lighter than you desire. NEVER BARE SHAFT BROADHEADS! Field tips/target points only. Broadheads will act like fletching on the wrong end and wild flight can result. Now to get started, step back 15 or so yards and start shooting 3 or 4 bare shafts mixed with 3 or 4 identical fletched shafts aiming for a spot. Odds are they are not going to fly very well so we need to start making adjustments to straighten them out. You are going to make adjustments based on where the groups are in relation to eack other, not on whether the nocks are kicking one way or another. We want to take care of any up/down problems first. If the majority of your bare shafts are grouping high or low of where the majority of your fletched arrows are, the nock point needs to be adjusted. Ignore left and right problems at this time. If your bare shafts are grouping lower than your fletched shafts, lower your nock point a tiny bit, maybe 1/32" and shoot several more arrows. If you lower your nock point all the way to zero and they are still hitting low, your nock point was too low to start with and the back of the arrow is "kicking" off the shelf, giving a "low" indication! If they impact (group) higher, raise your nock point. Once your bare shafts are grouping close up/down with the fletched shafts, it's time to work on any left/right problems. If the majority of your bare shafts are impacting (grouping) left of the majority of your fletched shafts, your arrows are too stiff. To correct this you have several options. The easiest is to increase point weight one step and try again. It's possible you may have to go from a 125gr tip to 190gr to get good flight! Another option if you have a thick side plate on your arrow shelf in the sight window is to reduce the thickness of that side plate, move the arrow closer to center shot, and test again. It's also possible you may never get good flight if they are way too stiff and you will be forced to get new shafts of a weaker spine. Hopefully, that won't be the case. If the majority of your bare shafts impact (group) right of your fletched shafts, they are too weak. Reduce your tip weight and try again, or build out your side plate further away from center shot. You can shorten your arrows 1/2" at a time which will make the arrow stiffer. Again if the problem can not be corrected, new shafts of a higher spine may be needed. Remember to never base adjustments on one or two shots, shoot many shots mixing bare and fletched shafts, and average the relationship between the groups. For example, if 5 bare shaft shots went left of the fletched shafts, and one went right, adjust for a shooting left indication. Change only one thing at a time and evaluate the results. Changing from a 2018 to a 2117 for example is TWO CHANGES, not one! You have changed spine and center shot!
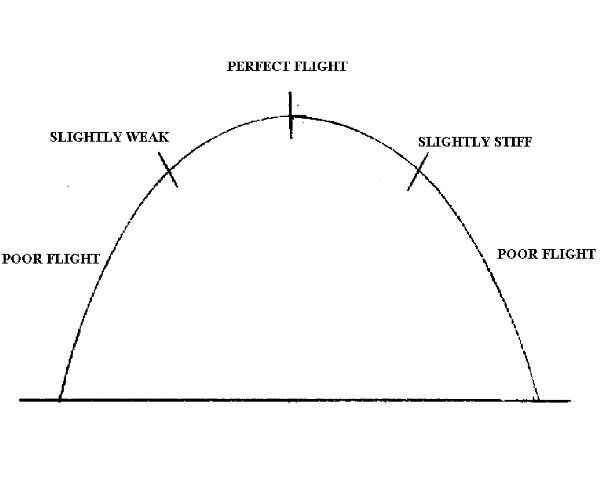
A properly tuned setup, bare shafts, and fletched shafts will group together out to 30 yards or more. Expect the bare shaft groups to be somewhat larger than the fletched groups for obvious reasons! The better your form is, the tighter the groups will be and the farther away you can maintain good groups, and finer tuning can be accomplished. The most forgiving arrow to shoot will actually show a slightly weak/slightly high nock point indication. In other words, at 20 yds or more, bare shafts grouping a little low and right is perfect because fletching makes a shaft react slightly stiffer. Totally confused? Here is an overview:
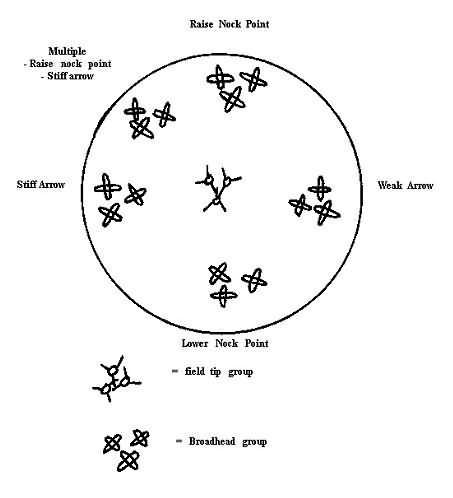
For the hunter, this is the bottom line, broadheads that fly true and straight where you look every time! It would be nice to think that with all the tuning you have done to this point you could just glue on matching weight broadheads and get perfect arrow flight, that rarely happens but you should be close! The blades of a broadhead try to plane and steer the arrow so any small tuning problems that were not detected prior will be magnified greatly. I can't emphasize enough how important it is to shoot your broadheads and correct any flight problems BEFORE YOU GO HUNTING WITH THEM! After tuning and practicing with your broadheads, be sure to re-sharpen them to a razor edge. The first step in tuning your broadheads is to go through the tuning process for your field tips, next is installing the broadheads. Straightness is a must, spin them on a flat table or in a cresting jig to check for wobble. You can spin them on the tip but the very tip can be filed slightly off center showing a wobble that won't cause a flight problem or vice versa. In theory, the orientation of the blades to the fletching or your sight window should make no difference but.... I feel they should at least all be the same from arrow to arrow and I mount 2 bladed heads horizontal and 3 bladed heads "V" up. I do this for two reasons, most folks mess up a release more often than any other mistake. This results in more side to side "kick" than normal and a 2 bladed heads mounted horizontal will not plane as badly, arrow rotation due to helical fletching starts slowly so the arrow is flying for several feet before full rotation starts. The other reason I mount my heads this way is I don't like anything sticking up into my sight picture that isn't there normally when I'm practicing with field tips. Let's get shootin'... Get back 20 or so yards from a suitable broadhead target and start shooting field tips and broadheads. Our goal here is to get your broadheads and field tips grouping in the same spot. If they don't, you will try to make adjustments in you "aiming" depending on which arrows you are shooting and that won't happen with a case of buck fever! Take a look at the diagram below:
If all your broadheads are grouping together but somewhere other than with your field tips, slight nock point changes and spine changes will bring them in. Make all adjustments one at a time and small, and evaluate the results before making more changes. If you make a change in something and things get worse, put it back and go the other way! If most of your broadheads are shooting stiff and a brace height change doesn't work, adding a touch of lead in front of a short wood taper or broadhead adapter should fix it, or arrows a 1/2" or so longer will soften them a little. For weak indications, going from a long broadhead adapter to a short will knock off a few grains, and shortening the shaft if it's a little too long will stiffen it up a little too. Once you get them grouping together at 20 yards, if you want to fine tune even better, wet the feathers of your broadheads until the feathers are matted down, and repeat the process! Having that huge buck show up with matted feathers after a rain storm is not the time to find out you have tuning problems!
Tuning is essential to get the best accuracy and performance out of your bow. Most of this is science and the better you understand the relationships and the cause and effects of all the variables, the easier it is. I hope this information will help you enjoy archery even more and remove any doubts about your equipment, putting the excuses for missing where they should be, on the shooter! |

 First it must be understood that ANYTHING you do to the bow affects tuning so it is important to set the bow up EXACTLY the way you intend to use it. If you tune your bow and then later add a bow quiver, it changes the tuning, change string silencer styles or position, changes the tuning, adding limb covers or tip protector, changes the tuning.......Granted some changes are so minor that we aren't good enough shots to detect but the changes are there nonetheless. Several tiny changes can add up to take a good shooting bow to poor and you scratch your head wondering why? So, if you are going to hunt with a quiver, put it on, and fill it full of arrows, minus one....Exactly the way it will be when that trophy buck comes to visit.... String silencers put them on...In most cases, place the silencers at the 1/4 points. Measure from where the string just touches the limb to the other point where it just touches the limb, divide by 4, and place the silencers there.
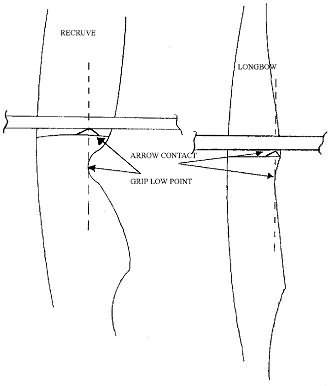

Related Posts